內容目录
- Volt 模版引擎(Volt: Template Engine)
- 简介(Introduction)
- 启用 Volt(Activating Volt)
- 基本用法(Basic Usage)
- 变量(Variables)
- 过滤器(Filters)
- 注释(Comments)
- 流程控制列表(List of Control Structures)
- 赋值(Assignments)
- 表达式(Expressions)
- 测试运算(Tests)
- 宏定义(Macros)
- 使用标签助手(Using Tag Helpers)
- 函数(Functions)
- 视图集成(View Integration)
- 模版的继承(Template Inheritance)
- 自动编码模式(Autoescape mode)
- 扩展 Volt(Extending Volt)
- 缓存视图片段(Caching view fragments)
- 注入服务到模版(Inject Services into a Template)
- 独立的组件(Stand-alone component)
- 外部资源(External Resources)
上一个主题
下一个主题
Volt 模版引擎(Volt: Template Engine)
Volt 是一个用C为PHP编写的超快的并且对设计师友好的模板语言。Volt 提供一组辅助工具有助于你以一种更简单的的方式编写视图(Views)。 同时,Volt与Phalcon的其他组件高度集成在一起,就像你在应用中单独使用Volt一样。
Volt is inspired by Jinja, originally created by Armin Ronacher. Therefore many developers will be in familiar territory using the same syntax they have been using with similar template engines. Volt’s syntax and features have been enhanced with more elements and of course with the performance that developers have been accustomed to while working with Phalcon.
简介(Introduction)
Volt 视图被编译成纯PHP代码,所以基本上他们节省手工编写PHP代码的工作:
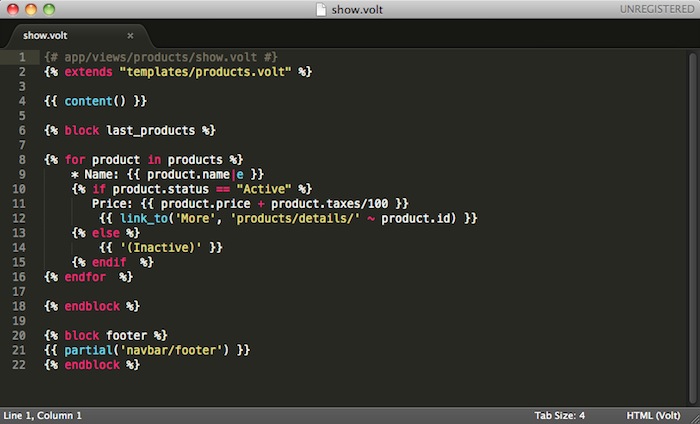
{# app/views/products/show.volt #}

{% block last_products %}

{% for product in products %}
    * Name: {{ product.name|e }}
    {% if product.status === "Active" %}
       Price: {{ product.price + product.taxes/100 }}
    {% endif  %}
{% endfor  %}

{% endblock %}
启用 Volt(Activating Volt)
和其他模板引擎一样,你需要将Volt模板注册到视图组件中,并设置模板文件通用后缀名,或者直接使用标准的后缀名”.phtml”才能正常使用:
<?php

use Phalcon\Mvc\View;
use Phalcon\Mvc\View\Engine\Volt;

// Register Volt as a service
$di->set(
    "voltService",
    function ($view, $di) {
        $volt = new Volt($view, $di);

        $volt->setOptions(
            [
                "compiledPath"      => "../app/compiled-templates/",
                "compiledExtension" => ".compiled",
            ]
        );

        return $volt;
    }
);

// Register Volt as template engine
$di->set(
    "view",
    function () {
        $view = new View();

        $view->setViewsDir("../app/views/");

        $view->registerEngines(
            [
                ".volt" => "voltService",
            ]
        );

        return $view;
    }
);
使用标准的”.phtml” 后缀名:
<?php

$view->registerEngines(
    [
        ".phtml" => "voltService",
    ]
);
You don’t have to specify the Volt Service in the DI; you can also use the Volt engine with the default settings:
<?php

$view->registerEngines(
    [
        ".volt" => "Phalcon\\Mvc\\View\\Engine\\Volt",
    ]
);
If you do not want to reuse Volt as a service, you can pass an anonymous function to register the engine instead of a service name:
<?php

use Phalcon\Mvc\View;
use Phalcon\Mvc\View\Engine\Volt;

// Register Volt as template engine with an anonymous function
$di->set(
    "view",
    function () {
        $view = new \Phalcon\Mvc\View();

        $view->setViewsDir("../app/views/");

        $view->registerEngines(
            [
                ".volt" => function ($view, $di) {
                    $volt = new Volt($view, $di);

                    // Set some options here

                    return $volt;
                }
            ]
        );

        return $view;
    }
);
The following options are available in Volt:
| Option | Description | Default |
|---|---|---|
compiledPath |
A writable path where the compiled PHP templates will be placed | ./ |
compiledExtension |
An additional extension appended to the compiled PHP file | .php |
compiledSeparator |
Volt replaces the directory separators / and \ by this separator in order to create a single file in the compiled directory | %% |
stat |
Whether Phalcon must check if exists differences between the template file and its compiled path | true |
compileAlways |
Tell Volt if the templates must be compiled in each request or only when they change | false |
prefix |
Allows to prepend a prefix to the templates in the compilation path | null |
autoescape |
Enables globally autoescape of HTML | false |
The compilation path is generated according to the above options, if the developer wants total freedom defining the compilation path, an anonymous function can be used to generate it, this function receives the relative path to the template in the views directory. The following examples show how to change the compilation path dynamically:
<?php

// Just append the .php extension to the template path
// leaving the compiled templates in the same directory
$volt->setOptions(
    [
        "compiledPath" => function ($templatePath) {
            return $templatePath . ".php";
        }
    ]
);

// Recursively create the same structure in another directory
$volt->setOptions(
    [
        "compiledPath" => function ($templatePath) {
            $dirName = dirname($templatePath);

            if (!is_dir("cache/" . $dirName)) {
                mkdir("cache/" . $dirName);
            }

            return "cache/" . $dirName . "/". $templatePath . ".php";
        }
    ]
);
基本用法(Basic Usage)
视图通常由Volt模板代码和HTML代码生成,甚至也含有PHP代码。Volt模板中有一些特殊分隔符的用法: {% ... %} 用于执行流程控制语句如if判断、for循环及赋值处理等等,
{{ ... }} 用于在模板中输出表达式的执行结果。
下面例子介绍了一些基础用法:
{# app/views/posts/show.phtml #}
<!DOCTYPE html>
<html>
    <head>
        <title>{{ title }} - An example blog</title>
    </head>
    <body>

        {% if show_navigation %}
            <ul id="navigation">
                {% for item in menu %}
                    <li>
                        <a href="{{ item.href }}">
                            {{ item.caption }}
                        </a>
                    </li>
                {% endfor %}
            </ul>
        {% endif %}

        <h1>{{ post.title }}</h1>

        <div class="content">
            {{ post.content }}
        </div>

    </body>
</html>
使用 Phalcon\Mvc\View 实例可以从控制器中把变量传递给视图。
在下面的示例中,有四个变量传递给了视图: show_navigation, menu, title and post:
<?php

use Phalcon\Mvc\Controller;

class PostsController extends Controller
{
    public function showAction()
    {
        $post = Post::findFirst();
        $menu = Menu::findFirst();

        $this->view->show_navigation = true;
        $this->view->menu            = $menu;
        $this->view->title           = $post->title;
        $this->view->post            = $post;

        // Or...

        $this->view->setVar("show_navigation", true);
        $this->view->setVar("menu",            $menu);
        $this->view->setVar("title",           $post->title);
        $this->view->setVar("post",            $post);
    }
}
变量(Variables)
对象变量可能有一些属性值,可以使用 foo.bar 的方式来访问。如果传递的是一个数组变量,则必须使用 foo['bar'] 的方式来访问。
{{ post.title }} {# for $post->title #}
{{ post['title'] }} {# for $post['title'] #}
过滤器(Filters)
模板中的变量可以通过过滤器进行格式化。操作符 | 适用于对变量进行格式化:
{{ post.title|e }}
{{ post.content|striptags }}
{{ name|capitalize|trim }}
以下是Volt模板内置的过滤器列表:
| Filter | Description |
|---|---|
e |
Applies Phalcon\Escaper->escapeHtml() to the value |
escape |
Applies Phalcon\Escaper->escapeHtml() to the value |
escape_css |
Applies Phalcon\Escaper->escapeCss() to the value |
escape_js |
Applies Phalcon\Escaper->escapeJs() to the value |
escape_attr |
Applies Phalcon\Escaper->escapeHtmlAttr() to the value |
trim |
Applies the trim PHP function to the value. Removing extra spaces |
left_trim |
Applies the ltrim PHP function to the value. Removing extra spaces |
right_trim |
Applies the rtrim PHP function to the value. Removing extra spaces |
striptags |
Applies the striptags PHP function to the value. Removing HTML tags |
slashes |
Applies the slashes PHP function to the value. Escaping values |
stripslashes |
Applies the stripslashes PHP function to the value. Removing escaped quotes |
capitalize |
Capitalizes a string by applying the ucwords PHP function to the value |
lower |
Change the case of a string to lowercase |
upper |
Change the case of a string to uppercase |
length |
Counts the string length or how many items are in an array or object |
nl2br |
Changes newlines \n by line breaks (<br />). Uses the PHP function nl2br |
sort |
Sorts an array using the PHP function asort |
keys |
Returns the array keys using array_keys |
join |
Joins the array parts using a separator join |
format |
Formats a string using sprintf. |
json_encode |
Converts a value into its JSON representation |
json_decode |
Converts a value from its JSON representation to a PHP representation |
abs |
Applies the abs PHP function to a value. |
url_encode |
Applies the urlencode PHP function to the value |
default |
Sets a default value in case that the evaluated expression is empty (is not set or evaluates to a falsy value) |
convert_encoding |
Converts a string from one charset to another |
Examples:
{# e or escape filter #}
{{ "<h1>Hello<h1>"|e }}
{{ "<h1>Hello<h1>"|escape }}

{# trim filter #}
{{ "   hello   "|trim }}

{# striptags filter #}
{{ "<h1>Hello<h1>"|striptags }}

{# slashes filter #}
{{ "'this is a string'"|slashes }}

{# stripslashes filter #}
{{ "\'this is a string\'"|stripslashes }}

{# capitalize filter #}
{{ "hello"|capitalize }}

{# lower filter #}
{{ "HELLO"|lower }}

{# upper filter #}
{{ "hello"|upper }}

{# length filter #}
{{ "robots"|length }}
{{ [1, 2, 3]|length }}

{# nl2br filter #}
{{ "some\ntext"|nl2br }}

{# sort filter #}
{% set sorted = [3, 1, 2]|sort %}

{# keys filter #}
{% set keys = ['first': 1, 'second': 2, 'third': 3]|keys %}

{# join filter #}
{% set joined = "a".."z"|join(",") %}

{# format filter #}
{{ "My real name is %s"|format(name) }}

{# json_encode filter #}
{% set encoded = robots|json_encode %}

{# json_decode filter #}
{% set decoded = '{"one":1,"two":2,"three":3}'|json_decode %}

{# url_encode filter #}
{{ post.permanent_link|url_encode }}

{# convert_encoding filter #}
{{ "désolé"|convert_encoding('utf8', 'latin1') }}
注释(Comments)
Comments may also be added to a template using the {# ... #} delimiters. All text inside them is just ignored in the final output:
{# note: this is a comment
    {% set price = 100; %}
#}
流程控制列表(List of Control Structures)
Volt provides a set of basic but powerful control structures for use in templates:
循环语句 For
Loop over each item in a sequence. The following example shows how to traverse a set of “robots” and print his/her name:
<h1>Robots</h1>
<ul>
    {% for robot in robots %}
        <li>
            {{ robot.name|e }}
        </li>
    {% endfor %}
</ul>
for-loops can also be nested:
<h1>Robots</h1>
{% for robot in robots %}
    {% for part in robot.parts %}
        Robot: {{ robot.name|e }} Part: {{ part.name|e }} <br />
    {% endfor %}
{% endfor %}
You can get the element “keys” as in the PHP counterpart using the following syntax:
{% set numbers = ['one': 1, 'two': 2, 'three': 3] %}

{% for name, value in numbers %}
    Name: {{ name }} Value: {{ value }}
{% endfor %}
An “if” evaluation can be optionally set:
{% set numbers = ['one': 1, 'two': 2, 'three': 3] %}

{% for value in numbers if value < 2 %}
    Value: {{ value }}
{% endfor %}

{% for name, value in numbers if name !== 'two' %}
    Name: {{ name }} Value: {{ value }}
{% endfor %}
If an ‘else’ is defined inside the ‘for’, it will be executed if the expression in the iterator result in zero iterations:
<h1>Robots</h1>
{% for robot in robots %}
    Robot: {{ robot.name|e }} Part: {{ part.name|e }} <br />
{% else %}
    There are no robots to show
{% endfor %}
Alternative syntax:
<h1>Robots</h1>
{% for robot in robots %}
    Robot: {{ robot.name|e }} Part: {{ part.name|e }} <br />
{% elsefor %}
    There are no robots to show
{% endfor %}
循环控制(Loop Controls)
The ‘break’ and ‘continue’ statements can be used to exit from a loop or force an iteration in the current block:
{# skip the even robots #}
{% for index, robot in robots %}
    {% if index is even %}
        {% continue %}
    {% endif %}
    ...
{% endfor %}
{# exit the foreach on the first even robot #}
{% for index, robot in robots %}
    {% if index is even %}
        {% break %}
    {% endif %}
    ...
{% endfor %}
条件判断语句 If
As PHP, an “if” statement checks if an expression is evaluated as true or false:
<h1>Cyborg Robots</h1>
<ul>
    {% for robot in robots %}
        {% if robot.type === "cyborg" %}
            <li>{{ robot.name|e }}</li>
        {% endif %}
    {% endfor %}
</ul>
The else clause is also supported:
<h1>Robots</h1>
<ul>
    {% for robot in robots %}
        {% if robot.type === "cyborg" %}
            <li>{{ robot.name|e }}</li>
        {% else %}
            <li>{{ robot.name|e }} (not a cyborg)</li>
        {% endif %}
    {% endfor %}
</ul>
The ‘elseif’ control flow structure can be used together with if to emulate a ‘switch’ block:
{% if robot.type === "cyborg" %}
    Robot is a cyborg
{% elseif robot.type === "virtual" %}
    Robot is virtual
{% elseif robot.type === "mechanical" %}
    Robot is mechanical
{% endif %}
循环上下文(Loop Context)
A special variable is available inside ‘for’ loops providing you information about
| Variable | Description |
|---|---|
loop.index |
The current iteration of the loop. (1 indexed) |
loop.index0 |
The current iteration of the loop. (0 indexed) |
loop.revindex |
The number of iterations from the end of the loop (1 indexed) |
loop.revindex0 |
The number of iterations from the end of the loop (0 indexed) |
loop.first |
True if in the first iteration. |
loop.last |
True if in the last iteration. |
loop.length |
The number of items to iterate |
{% for robot in robots %}
    {% if loop.first %}
        <table>
            <tr>
                <th>#</th>
                <th>Id</th>
                <th>Name</th>
            </tr>
    {% endif %}
            <tr>
                <td>{{ loop.index }}</td>
                <td>{{ robot.id }}</td>
                <td>{{ robot.name }}</td>
            </tr>
    {% if loop.last %}
        </table>
    {% endif %}
{% endfor %}
赋值(Assignments)
Variables may be changed in a template using the instruction “set”:
{% set fruits = ['Apple', 'Banana', 'Orange'] %}

{% set name = robot.name %}
Multiple assignments are allowed in the same instruction:
{% set fruits = ['Apple', 'Banana', 'Orange'], name = robot.name, active = true %}
Additionally, you can use compound assignment operators:
{% set price += 100.00 %}

{% set age *= 5 %}
The following operators are available:
| Operator | Description |
|---|---|
| = | Standard Assignment |
| += | Addition assignment |
| -= | Subtraction assignment |
| *= | Multiplication assignment |
| /= | Division assignment |
表达式(Expressions)
Volt provides a basic set of expression support, including literals and common operators.
A expression can be evaluated and printed using the ‘{{‘ and ‘}}’ delimiters:
{{ (1 + 1) * 2 }}
If an expression needs to be evaluated without be printed the ‘do’ statement can be used:
{% do (1 + 1) * 2 %}
字面值(Literals)
The following literals are supported:
| Filter | Description |
|---|---|
| “this is a string” | Text between double quotes or single quotes are handled as strings |
| 100.25 | Numbers with a decimal part are handled as doubles/floats |
| 100 | Numbers without a decimal part are handled as integers |
| false | Constant “false” is the boolean false value |
| true | Constant “true” is the boolean true value |
| null | Constant “null” is the Null value |
数组(Arrays)
Whether you’re using PHP 5.3 or >= 5.4 you can create arrays by enclosing a list of values in square brackets:
{# Simple array #}
{{ ['Apple', 'Banana', 'Orange'] }}

{# Other simple array #}
{{ ['Apple', 1, 2.5, false, null] }}

{# Multi-Dimensional array #}
{{ [[1, 2], [3, 4], [5, 6]] }}

{# Hash-style array #}
{{ ['first': 1, 'second': 4/2, 'third': '3'] }}
花括号也能用来定义数组或关联数组:
{% set myArray = {'Apple', 'Banana', 'Orange'} %}
{% set myHash  = {'first': 1, 'second': 4/2, 'third': '3'} %}
算术运算(Math)
你可以在模板里面使用下列操作符来进行算术运算:
| Operator | Description |
|---|---|
+ |
Perform an adding operation. {{ 2 + 3 }} returns 5 |
- |
Perform a substraction operation {{ 2 - 3 }} returns -1 |
* |
Perform a multiplication operation {{ 2 * 3 }} returns 6 |
/ |
Perform a division operation {{ 10 / 2 }} returns 5 |
% |
Calculate the remainder of an integer division {{ 10 % 3 }} returns 1 |
比较运算(Comparisons)
The following comparison operators are available:
| Operator | Description |
|---|---|
== |
Check whether both operands are equal |
!= |
Check whether both operands aren’t equal |
<> |
Check whether both operands aren’t equal |
> |
Check whether left operand is greater than right operand |
< |
Check whether left operand is less than right operand |
<= |
Check whether left operand is less or equal than right operand |
>= |
Check whether left operand is greater or equal than right operand |
=== |
Check whether both operands are identical |
!== |
Check whether both operands aren’t identical |
逻辑运算(Logic)
Logic operators are useful in the “if” expression evaluation to combine multiple tests:
| Operator | Description |
|---|---|
or |
Return true if the left or right operand is evaluated as true |
and |
Return true if both left and right operands are evaluated as true |
not |
Negates an expression |
( expr ) |
Parenthesis groups expressions |
其他操作(Other Operators)
Additional operators seen the following operators are available:
| Operator | Description |
|---|---|
~ |
Concatenates both operands {{ "hello " ~ "world" }} |
| |
Applies a filter in the right operand to the left {{ "hello"|uppercase }} |
.. |
Creates a range {{ 'a'..'z' }} {{ 1..10 }} |
is |
Same as == (equals), also performs tests |
in |
To check if an expression is contained into other expressions if "a" in "abc" |
is not |
Same as != (not equals) |
'a' ? 'b' : 'c' |
Ternary operator. The same as the PHP ternary operator |
++ |
Increments a value |
-- |
Decrements a value |
下面的示例显示了如何使用操作符:
{% set robots = ['Voltron', 'Astro Boy', 'Terminator', 'C3PO'] %}

{% for index in 0..robots|length %}
    {% if robots[index] is defined %}
        {{ "Name: " ~ robots[index] }}
    {% endif %}
{% endfor %}
测试运算(Tests)
Tests can be used to test if a variable has a valid expected value. The operator “is” is used to perform the tests:
{% set robots = ['1': 'Voltron', '2': 'Astro Boy', '3': 'Terminator', '4': 'C3PO'] %}

{% for position, name in robots %}
    {% if position is odd %}
        {{ name }}
    {% endif %}
{% endfor %}
The following built-in tests are available in Volt:
| Test | Description |
|---|---|
defined |
Checks if a variable is defined (isset()) |
empty |
Checks if a variable is empty |
even |
Checks if a numeric value is even |
odd |
Checks if a numeric value is odd |
numeric |
Checks if value is numeric |
scalar |
Checks if value is scalar (not an array or object) |
iterable |
Checks if a value is iterable. Can be traversed by a “for” statement |
divisibleby |
Checks if a value is divisible by other value |
sameas |
Checks if a value is identical to other value |
type |
Checks if a value is of the specified type |
More examples:
{% if robot is defined %}
    The robot variable is defined
{% endif %}

{% if robot is empty %}
    The robot is null or isn't defined
{% endif %}

{% for key, name in [1: 'Voltron', 2: 'Astroy Boy', 3: 'Bender'] %}
    {% if key is even %}
        {{ name }}
    {% endif %}
{% endfor %}

{% for key, name in [1: 'Voltron', 2: 'Astroy Boy', 3: 'Bender'] %}
    {% if key is odd %}
        {{ name }}
    {% endif %}
{% endfor %}

{% for key, name in [1: 'Voltron', 2: 'Astroy Boy', 'third': 'Bender'] %}
    {% if key is numeric %}
        {{ name }}
    {% endif %}
{% endfor %}

{% set robots = [1: 'Voltron', 2: 'Astroy Boy'] %}
{% if robots is iterable %}
    {% for robot in robots %}
        ...
    {% endfor %}
{% endif %}

{% set world = "hello" %}
{% if world is sameas("hello") %}
    {{ "it's hello" }}
{% endif %}

{% set external = false %}
{% if external is type('boolean') %}
    {{ "external is false or true" }}
{% endif %}
宏定义(Macros)
Macros can be used to reuse logic in a template, they act as PHP functions, can receive parameters and return values:
{# Macro "display a list of links to related topics" #}
{%- macro related_bar(related_links) %}
    <ul>
        {%- for link in related_links %}
            <li>
                <a href="{{ url(link.url) }}" title="{{ link.title|striptags }}">
                    {{ link.text }}
                </a>
            </li>
        {%- endfor %}
    </ul>
{%- endmacro %}

{# Print related links #}
{{ related_bar(links) }}

<div>This is the content</div>

{# Print related links again #}
{{ related_bar(links) }}
When calling macros, parameters can be passed by name:
{%- macro error_messages(message, field, type) %}
    <div>
        <span class="error-type">{{ type }}</span>
        <span class="error-field">{{ field }}</span>
        <span class="error-message">{{ message }}</span>
    </div>
{%- endmacro %}

{# Call the macro #}
{{ error_messages('type': 'Invalid', 'message': 'The name is invalid', 'field': 'name') }}
Macros can return values:
{%- macro my_input(name, class) %}
    {% return text_field(name, 'class': class) %}
{%- endmacro %}

{# Call the macro #}
{{ '<p>' ~ my_input('name', 'input-text') ~ '</p>' }}
And receive optional parameters:
{%- macro my_input(name, class="input-text") %}
    {% return text_field(name, 'class': class) %}
{%- endmacro %}

{# Call the macro #}
{{ '<p>' ~ my_input('name') ~ '</p>' }}
{{ '<p>' ~ my_input('name', 'input-text') ~ '</p>' }}
使用标签助手(Using Tag Helpers)
Volt is highly integrated with Phalcon\Tag, so it’s easy to use the helpers provided by that component in a Volt template:
{{ javascript_include("js/jquery.js") }}

{{ form('products/save', 'method': 'post') }}

    <label for="name">Name</label>
    {{ text_field("name", "size": 32) }}

    <label for="type">Type</label>
    {{ select("type", productTypes, 'using': ['id', 'name']) }}

    {{ submit_button('Send') }}

{{ end_form() }}
The following PHP is generated:
<?php echo Phalcon\Tag::javascriptInclude("js/jquery.js") ?>

<?php echo Phalcon\Tag::form(array('products/save', 'method' => 'post')); ?>

    <label for="name">Name</label>
    <?php echo Phalcon\Tag::textField(array('name', 'size' => 32)); ?>

    <label for="type">Type</label>
    <?php echo Phalcon\Tag::select(array('type', $productTypes, 'using' => array('id', 'name'))); ?>

    <?php echo Phalcon\Tag::submitButton('Send'); ?>

{{ end_form() }}
To call a Phalcon\Tag helper, you only need to call an uncamelized version of the method:
| Method | Volt function |
|---|---|
Phalcon\Tag::linkTo |
link_to |
Phalcon\Tag::textField |
text_field |
Phalcon\Tag::passwordField |
password_field |
Phalcon\Tag::hiddenField |
hidden_field |
Phalcon\Tag::fileField |
file_field |
Phalcon\Tag::checkField |
check_field |
Phalcon\Tag::radioField |
radio_field |
Phalcon\Tag::dateField |
date_field |
Phalcon\Tag::emailField |
email_field |
Phalcon\Tag::numericField |
numeric_field |
Phalcon\Tag::submitButton |
submit_button |
Phalcon\Tag::selectStatic |
select_static |
Phalcon\Tag::select |
select |
Phalcon\Tag::textArea |
text_area |
Phalcon\Tag::form |
form |
Phalcon\Tag::endForm |
end_form |
Phalcon\Tag::getTitle |
get_title |
Phalcon\Tag::stylesheetLink |
stylesheet_link |
Phalcon\Tag::javascriptInclude |
javascript_include |
Phalcon\Tag::image |
image |
Phalcon\Tag::friendlyTitle |
friendly_title |
函数(Functions)
The following built-in functions are available in Volt:
| Name | Description |
|---|---|
content |
Includes the content produced in a previous rendering stage |
get_content |
Same as content |
partial |
Dynamically loads a partial view in the current template |
super |
Render the contents of the parent block |
time |
Calls the PHP function with the same name |
date |
Calls the PHP function with the same name |
dump |
Calls the PHP function var_dump() |
version |
Returns the current version of the framework |
constant |
Reads a PHP constant |
url |
Generate a URL using the ‘url’ service |
视图集成(View Integration)
Also, Volt is integrated with Phalcon\Mvc\View, you can play with the view hierarchy and include partials as well:
{{ content() }}

<!-- Simple include of a partial -->
<div id="footer">{{ partial("partials/footer") }}</div>

<!-- Passing extra variables -->
<div id="footer">{{ partial("partials/footer", ['links': links]) }}</div>
A partial is included in runtime, Volt also provides “include”, this compiles the content of a view and returns its contents as part of the view which was included:
{# Simple include of a partial #}
<div id="footer">
    {% include "partials/footer" %}
</div>

{# Passing extra variables #}
<div id="footer">
    {% include "partials/footer" with ['links': links] %}
</div>
包含(Include)
‘include’ has a special behavior that will help us improve performance a bit when using Volt, if you specify the extension when including the file and it exists when the template is compiled, Volt can inline the contents of the template in the parent template where it’s included. Templates aren’t inlined if the ‘include’ have variables passed with ‘with’:
{# The contents of 'partials/footer.volt' is compiled and inlined #}
<div id="footer">
    {% include "partials/footer.volt" %}
</div>
Partial vs Include
Keep the following points in mind when choosing to use the “partial” function or “include”:
- ‘Partial’ 既可以引入Volt模板,也可以引入其他模板引擎的模板
- ‘Partial’ 在引入模板的时候,可以传递表达式(如变量)
- ‘Partial’ 更适合引入经常有变动的模板
- ‘Include’ 是引入编译后的模板内容,以提升性能
- ‘Include’ 只能引入Volt模板
- ‘Include’ 在编译时须引入现有的模板
模版的继承(Template Inheritance)
你可以创建基础模板,供其他模板继承,达到代码复用的目的。在基础模板中使用 block 定义代码块,则子模板可以实现重写功能。 我们假设有一个这样的基础模板:
{# templates/base.volt #}
<!DOCTYPE html>
<html>
<head>
{% block head %}
<link rel="stylesheet" href="style.css" />
{% endblock %}
<title>{% block title %}{% endblock %} - My Webpage</title>
</head>
<body>
<div id="content">{% block content %}{% endblock %}</div>
<div id="footer">
{% block footer %}© Copyright 2015, All rights reserved.{% endblock %}
</div>
</body>
</html>
其他的模板继承了基础模板后,会重写基础模板中的 block 代码块:
{% extends "templates/base.volt" %}

{% block title %}Index{% endblock %}

{% block head %}<style type="text/css">.important { color: #336699; }</style>{% endblock %}

{% block content %}
    <h1>Index</h1>
    <p class="important">Welcome on my awesome homepage.</p>
{% endblock %}
在子模板中并不需要全部重写基础模板中的 block 块,按需要重写部分即可。最终输出如下示例:
<!DOCTYPE html>
<html>
<head>
<style type="text/css">.important { color: #336699; }</style>
<title>Index - My Webpage</title>
</head>
<body>
<div id="content">
<h1>Index</h1>
<p class="important">Welcome on my awesome homepage.</p>
</div>
<div id="footer">
© Copyright 2015, All rights reserved.
</div>
</body>
</html>
多重继承(Multiple Inheritance)
子模板也可以被其他模板继承,下面的示例演示了模板的多重继承:
{# main.volt #}
<!DOCTYPE html>
<html>
    <head>
        <title>Title</title>
    </head>

    <body>
        {% block content %}{% endblock %}
    </body>
</html>
“layout.volt” 继承 “main.volt”
{# layout.volt #}
{% extends "main.volt" %}

{% block content %}

    <h1>Table of contents</h1>

{% endblock %}
“index.volt” 又继承了 “layout.volt”:
{# index.volt #}
{% extends "layout.volt" %}

{% block content %}

    {{ super() }}

    <ul>
        <li>Some option</li>
        <li>Some other option</li>
    </ul>

{% endblock %}
渲染 “index.volt” 后输出:
<!DOCTYPE html>
<html>
    <head>
        <title>Title</title>
    </head>

    <body>

        <h1>Table of contents</h1>

        <ul>
            <li>Some option</li>
            <li>Some other option</li>
        </ul>

    </body>
</html>
注意示例中调用的 super() 方法,此方法用于获取父模板中渲染的内容。
As partials, the path set to “extends” is a relative path under the current views directory (i.e. app/views/).
通常情况下,出于性能方面的考虑,Volt模板引擎在重新编译模板时只会检查子模板中的内容变更。 所以建议设置Volt模板引擎的选项参数'compileAlways' => true。这样模板会实时编译,并检查父模板中的内容变更。
自动编码模式(Autoescape mode)
You can enable auto-escaping of all variables printed in a block using the autoescape mode:
Manually escaped: {{ robot.name|e }}

{% autoescape true %}
    Autoescaped: {{ robot.name }}
    {% autoescape false %}
        No Autoescaped: {{ robot.name }}
    {% endautoescape %}
{% endautoescape %}
扩展 Volt(Extending Volt)
Unlike other template engines, Volt itself is not required to run the compiled templates. Once the templates are compiled there is no dependence on Volt. With performance independence in mind, Volt only acts as a compiler for PHP templates.
The Volt compiler allow you to extend it adding more functions, tests or filters to the existing ones.
函数(Functions)
Functions act as normal PHP functions, a valid string name is required as function name. Functions can be added using two strategies, returning a simple string or using an anonymous function. Always is required that the chosen strategy returns a valid PHP string expression:
<?php

use Phalcon\Mvc\View\Engine\Volt;

$volt = new Volt($view, $di);

$compiler = $volt->getCompiler();

// This binds the function name 'shuffle' in Volt to the PHP function 'str_shuffle'
$compiler->addFunction("shuffle", "str_shuffle");
Register the function with an anonymous function. This case we use $resolvedArgs to pass the arguments exactly
as were passed in the arguments:
<?php

$compiler->addFunction(
    "widget",
    function ($resolvedArgs, $exprArgs) {
        return "MyLibrary\\Widgets::get(" . $resolvedArgs . ")";
    }
);
Treat the arguments independently and unresolved:
<?php

$compiler->addFunction(
    "repeat",
    function ($resolvedArgs, $exprArgs) use ($compiler) {
        // Resolve the first argument
        $firstArgument = $compiler->expression($exprArgs[0]['expr']);

        // Checks if the second argument was passed
        if (isset($exprArgs[1])) {
            $secondArgument = $compiler->expression($exprArgs[1]['expr']);
        } else {
            // Use '10' as default
            $secondArgument = '10';
        }

        return "str_repeat(" . $firstArgument . ", " . $secondArgument . ")";
    }
);
Generate the code based on some function availability:
<?php

$compiler->addFunction(
    "contains_text",
    function ($resolvedArgs, $exprArgs) {
        if (function_exists("mb_stripos")) {
            return "mb_stripos(" . $resolvedArgs . ")";
        } else {
            return "stripos(" . $resolvedArgs . ")";
        }
    }
);
Built-in functions can be overridden adding a function with its name:
<?php

// Replace built-in function dump
$compiler->addFunction("dump", "print_r");
过滤器(Filters)
A filter has the following form in a template: leftExpr|name(optional-args). Adding new filters is similar as seen with the functions:
<?php

// This creates a filter 'hash' that uses the PHP function 'md5'
$compiler->addFilter("hash", "md5");
<?php

$compiler->addFilter(
    "int",
    function ($resolvedArgs, $exprArgs) {
        return "intval(" . $resolvedArgs . ")";
    }
);
Built-in filters can be overridden adding a function with its name:
<?php

// Replace built-in filter 'capitalize'
$compiler->addFilter("capitalize", "lcfirst");
扩展(Extensions)
With extensions the developer has more flexibility to extend the template engine, and override the compilation of a specific instruction, change the behavior of an expression or operator, add functions/filters, and more.
An extension is a class that implements the events triggered by Volt as a method of itself.
For example, the class below allows to use any PHP function in Volt:
<?php

class PhpFunctionExtension
{
    /**
     * This method is called on any attempt to compile a function call
     */
    public function compileFunction($name, $arguments)
    {
        if (function_exists($name)) {
            return $name . "(". $arguments . ")";
        }
    }
}
The above class implements the method ‘compileFunction’ which is invoked before any attempt to compile a function call in any template. The purpose of the extension is to verify if a function to be compiled is a PHP function allowing to call it from the template. Events in extensions must return valid PHP code, this will be used as result of the compilation instead of the one generated by Volt. If an event doesn’t return an string the compilation is done using the default behavior provided by the engine.
The following compilation events are available to be implemented in extensions:
| Event/Method | Description |
|---|---|
compileFunction |
Triggered before trying to compile any function call in a template |
compileFilter |
Triggered before trying to compile any filter call in a template |
resolveExpression |
Triggered before trying to compile any expression. This allows the developer to override operators |
compileStatement |
Triggered before trying to compile any expression. This allows the developer to override any statement |
Volt extensions must be in registered in the compiler making them available in compile time:
<?php

// Register the extension in the compiler
$compiler->addExtension(
    new PhpFunctionExtension()
);
缓存视图片段(Caching view fragments)
With Volt it’s easy cache view fragments. This caching improves performance preventing that the contents of a block from being executed by PHP each time the view is displayed:
{% cache "sidebar" %}
    <!-- generate this content is slow so we are going to cache it -->
{% endcache %}
Setting a specific number of seconds:
{# cache the sidebar by 1 hour #}
{% cache "sidebar" 3600 %}
    <!-- generate this content is slow so we are going to cache it -->
{% endcache %}
Any valid expression can be used as cache key:
{% cache ("article-" ~ post.id) 3600 %}

    <h1>{{ post.title }}</h1>

    <p>{{ post.content }}</p>

{% endcache %}
The caching is done by the Phalcon\Cache component via the view component. Learn more about how this integration works in the section “Caching View Fragments”.
注入服务到模版(Inject Services into a Template)
If a service container (DI) is available for Volt, you can use the services by only accessing the name of the service in the template:
{# Inject the 'flash' service #}
<div id="messages">{{ flash.output() }}</div>

{# Inject the 'security' service #}
<input type="hidden" name="token" value="{{ security.getToken() }}">
独立的组件(Stand-alone component)
Using Volt in a stand-alone mode can be demonstrated below:
<?php

use Phalcon\Mvc\View\Engine\Volt\Compiler as VoltCompiler;

// Create a compiler
$compiler = new VoltCompiler();

// Optionally add some options
$compiler->setOptions(
    [
        // ...
    ]
);

// Compile a template string returning PHP code
echo $compiler->compileString(
    "{{ 'hello' }}"
);

// Compile a template in a file specifying the destination file
$compiler->compileFile(
    "layouts/main.volt",
    "cache/layouts/main.volt.php"
);

// Compile a template in a file based on the options passed to the compiler
$compiler->compile(
    "layouts/main.volt"
);

// Require the compiled templated (optional)
require $compiler->getCompiledTemplatePath();
外部资源(External Resources)
- A bundle for Sublime/Textmate is available here
- Album-O-Rama is a sample application using Volt as template engine, [Album-O-Rama on Github]
- Our website is running using Volt as template engine, [Our website on Github]
- Phosphorum, the Phalcon’s forum, also uses Volt, [Phosphorum on Github]
- Vökuró, is another sample application that use Volt, [Vökuró on Github]